1. The first step is to configure a schema that would hold all our scheduler tables. If you do not have a schema create or use an existing one. In my case i have a schema called S_NQ_SCHED wherein i would create all my scheduler tables.
2. Navigate to your {ORACLEBI}/Server/Schema folder and run the scheduler scripts. If you are on an Oracle Database, you would have to run SAJOBS.Oracle.sql. This would basically create the scheduler tables that Oracle Delivers would use later.
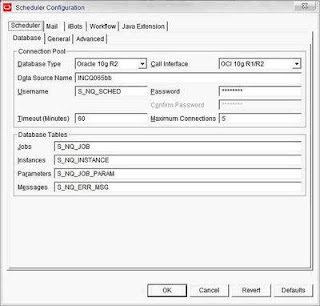
3. The next step is to open your Job Manager. Go to File – > Configuration Options and enter the schema and connection details for the scheduler schema. In my case it would be S_NQ_SCHED schema.
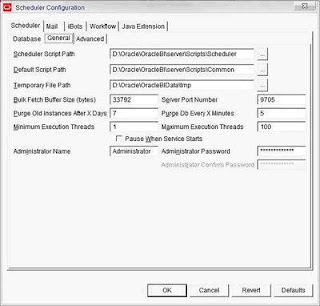
4. Go to the General tab. If you had followed the default install, then leave everything the same. Just enter in the Administrator usernames and passwords.
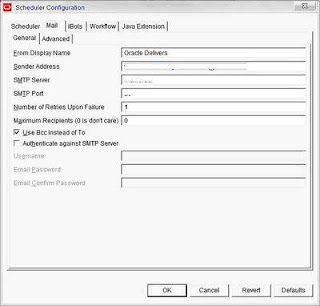
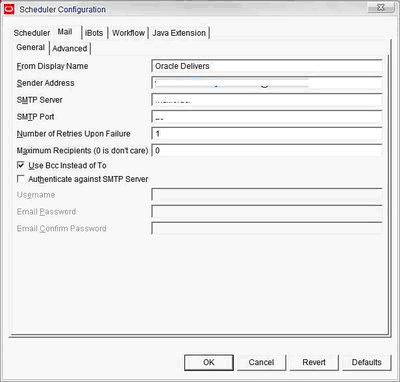
5. Go to the Mail tab and enter in your mail server details.
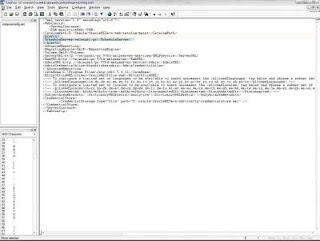
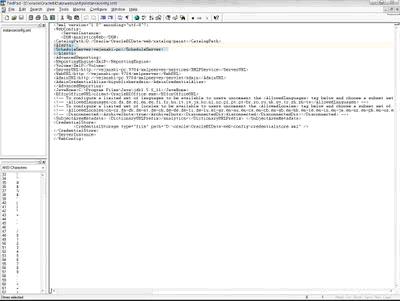
 6. Open your instanceconfig.xml and add in the scheduler details. This step basically lets the presentation server know about the machine and port details of the scheduler. By default the scheduler port is 9705.
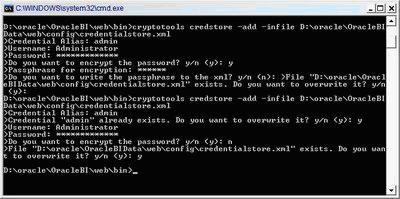
7. The next step is to run a cryptotools utility that would basically store the username and password of the scheduler into an XML file called credentialstore.xml.
8. Go to {OracleBI}/web/bin from command prompt. Then enter in the following command.
cryptotools credstore -add -infile OracleBIData_HOME/web/config/credentialstore.xml

Ensure that you have the alias as “Admin”.
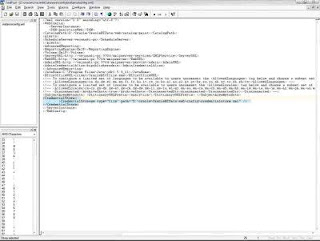
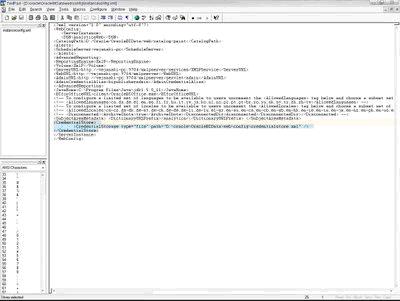
9. The next step is to add the details of this credentialstore.xml file into the instanceconfig.xml.
EXECUTING IBOTS

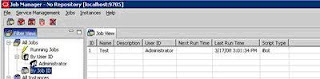
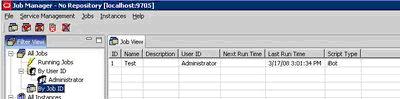
Once this is done, find out the jobid of this ibot from the Job Manager console.
Now, create a batch file to call this ibot on an on-demand basis(on unix you would have to create a shell script). This batch file would basically have this command.
saschinvoke -u Administrator/Administrator -j 1
 The advantage of the above batch file is that you can also pass parameters (jobids etc) dynamically to it. The next step is to create a simple DBMS_SCHEDULER job to call this utility.
BEGIN
DBMS_SCHEDULER.CREATE_JOB (
job_name => ’saschinvoke1′,
job_type => ‘EXECUTABLE’,
job_action => ‘D:\Oracle\OracleBI\server\Bin\saschinvoke.bat’,
repeat_interval => ‘FREQ=YEARLY’,
enabled => TRUE
);
END;
Now, create another procedure to run this job.
CREATE OR REPLACE PROCEDURE PRO_INVOKEIBOTS IS
BEGIN
DBMS_SCHEDULER.RUN_JOB(’saschinvoke1′);
HTP.PRINT(’<html>’);
HTP.PRINT(’<head>’);
HTP.PRINT(’<meta http-equiv=”Content-Type” content=”text/html”>’);
HTP.PRINT(’<title>EMAIL Successfully Sent</title>’);
HTP.PRINT(’</head>’);
HTP.PRINT(’<body TEXT=”#000000″ BGCOLOR=”#FFFFFF”>’);
HTP.PRINT(’<h1>Email Successfully Sent</h1>’);
HTP.PRINT(’</body>’);
HTP.PRINT(’</html>’);
END;
This is the procedure which we shall expose to be called from a URL using the Pl/SQL gateway. In order to do that, grant execute privilege on the above procedure to ANONYMOUS and add the procedure to the list of accepted and executable packages by the pl/sql gateway.
CREATE OR REPLACE function wwv_flow_epg_include_mod_local(procedure_name in varchar2)
return boolean is
begin
if upper(procedure_name) in (’HR.PRO_INVOKEIBOTS’) then
return TRUE;
else
return FALSE;
end if;
end wwv_flow_epg_include_mod_local;
GRANT EXECUTE ON PRO_INVOKEIBOTS to ANONYMOUS;
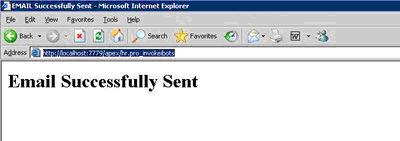
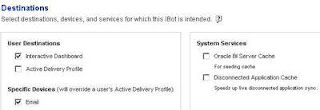
Once this is done, create a URL link in the dashboard to call the below URL
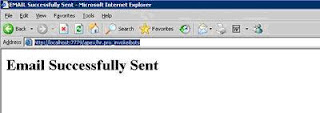
http://localhost:7779/apex/hr.pro_invokeibots
Clicking on the above URL should automatically send an email to the Administrator.
2. Navigate to your {ORACLEBI}/Server/Schema folder and run the scheduler scripts. If you are on an Oracle Database, you would have to run SAJOBS.Oracle.sql. This would basically create the scheduler tables that Oracle Delivers would use later.
3. The next step is to open your Job Manager. Go to File – > Configuration Options and enter the schema and connection details for the scheduler schema. In my case it would be S_NQ_SCHED schema.

4. Go to the General tab. If you had followed the default install, then leave everything the same. Just enter in the Administrator usernames and passwords.

5. Go to the Mail tab and enter in your mail server details.
7. The next step is to run a cryptotools utility that would basically store the username and password of the scheduler into an XML file called credentialstore.xml.
8. Go to {OracleBI}/web/bin from command prompt. Then enter in the following command.
cryptotools credstore -add -infile OracleBIData_HOME/web/config/credentialstore.xml
Ensure that you have the alias as “Admin”.
9. The next step is to add the details of this credentialstore.xml file into the instanceconfig.xml.
EXECUTING IBOTS
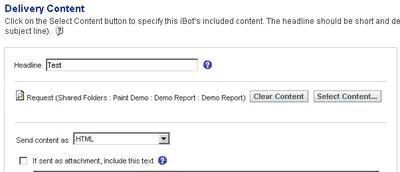
Once this is done, find out the jobid of this ibot from the Job Manager console.
Now, create a batch file to call this ibot on an on-demand basis(on unix you would have to create a shell script). This batch file would basically have this command.
saschinvoke -u Administrator/Administrator -j 1

BEGIN
DBMS_SCHEDULER.CREATE_JOB (
job_name => ’saschinvoke1′,
job_type => ‘EXECUTABLE’,
job_action => ‘D:\Oracle\OracleBI\server\Bin\saschinvoke.bat’,
repeat_interval => ‘FREQ=YEARLY’,
enabled => TRUE
);
END;
Now, create another procedure to run this job.
CREATE OR REPLACE PROCEDURE PRO_INVOKEIBOTS IS
BEGIN
DBMS_SCHEDULER.RUN_JOB(’saschinvoke1′);
HTP.PRINT(’<html>’);
HTP.PRINT(’<head>’);
HTP.PRINT(’<meta http-equiv=”Content-Type” content=”text/html”>’);
HTP.PRINT(’<title>EMAIL Successfully Sent</title>’);
HTP.PRINT(’</head>’);
HTP.PRINT(’<body TEXT=”#000000″ BGCOLOR=”#FFFFFF”>’);
HTP.PRINT(’<h1>Email Successfully Sent</h1>’);
HTP.PRINT(’</body>’);
HTP.PRINT(’</html>’);
END;
This is the procedure which we shall expose to be called from a URL using the Pl/SQL gateway. In order to do that, grant execute privilege on the above procedure to ANONYMOUS and add the procedure to the list of accepted and executable packages by the pl/sql gateway.
CREATE OR REPLACE function wwv_flow_epg_include_mod_local(procedure_name in varchar2)
return boolean is
begin
if upper(procedure_name) in (’HR.PRO_INVOKEIBOTS’) then
return TRUE;
else
return FALSE;
end if;
end wwv_flow_epg_include_mod_local;
GRANT EXECUTE ON PRO_INVOKEIBOTS to ANONYMOUS;
Once this is done, create a URL link in the dashboard to call the below URL
http://localhost:7779/apex/hr.pro_invokeibots

Clicking on the above URL should automatically send an email to the Administrator.